If you are a serious blogger and would like to view your content as a professional blogger, you may need to add a table in your blog post. Sometimes you need to insert a list of contents and then the table view is a more effective way to display the entire content. Adding a table in a Blogger post using a blogger post editor is very difficult. To add a table in BlogSpot, you need to know about HTML code, then you can create a table in a blog by manually arranging the tag in the post editor. So it's a bit difficult for those users who are not familiar with HTML codes. But here in this tutorial, I will help you insert a table into your blog post without actually using HTML code. In this tutorial, I'll tell you two different and easy ways to add a table to your blog post. Just follow all the steps one by one.
These are Following Steps:-
Step 01 –Create a Table In Microsoft Word
· Download and install Microsoft word (use any version of Ms word)
· Now open your MS word
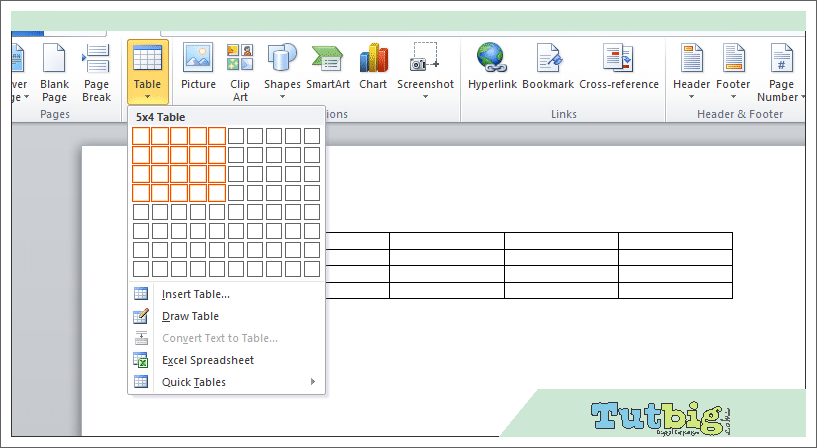
Create a table (Go to insert> Table> select the number of rows and columns.)for example we are creating a 3×3 table in Ms. Word.

· You can now adjust the distance between rows and columns. Fill in all the columns and rows with your content as you want it to display. See the screenshot below for an example.
Step 02
Once you have successfully created a table with MS, it is now time to get the HTML code that will be added to your blog post.
· Save your Ms. File in .html extension (Go to Ms. File >> Save as>click on the drop-down and select “web page filtered” and click on Save.

· now you need to convert your saved file in HTML web.so go to your saved file and right-click on it and open with>>Notepad.
· after open with notepad now copy all text.

Step 03
· Gog to your blogger website.
· Add a new post or open that post where you want to add a table.
· Click on HTML tab and paste (Ctrl+v) the HTML code (Which you copied in step 02)
· Now click on Preview to see your content table and publish your post.
Congratulations you have successfully added a table in your blogger post.
Now comes the second method.
Method 02
Step 01 – Create Microsoft table
· Download and install Microsoft word (use any version of Ms word)
· Now open your MS word
· Create a table (Go to insert> Table> select the number of rows and columns.)for example, we are creating a 3×3 table in Ms. Word.
· Complete the table with the content.
· Select the table by clicking the following highlight option, it will appear on mouse hover.
· Next, go to right-click and copy it.
Step 02 –Convert Table Into HTML Codes· Click here to go to Stabilizer and paste code here in the Text Field.
· Here in stabilizer, you can change font size, header color, and font style.
· Now click on Tableizer it button.it will convert your table into HTML codes.
· And copy all HTML code .we will use these codes in step 03.
Step 03· Go to the blogger website.
· Click to add a post to create a new post.
· Click on HTML Tab and paste HTML code here.
Or maybe you will see a piece of code like this ……………….
<div dir="ltr" style="text-align: left;" trbidi="on">
<br /></div>Paste your HTML code before <br/>
· Click on preview, if you are satisfied then click to publish the post.
Preview of my tableI hope you enjoy this Post and Photos. How To Add Table In Blogger Post Inside


